OK, so this just hit me as I was prototyping my latest thing - what I really want is a magic app that allows me to take a crappy paper sketch, say something like sketch-o-crapola:
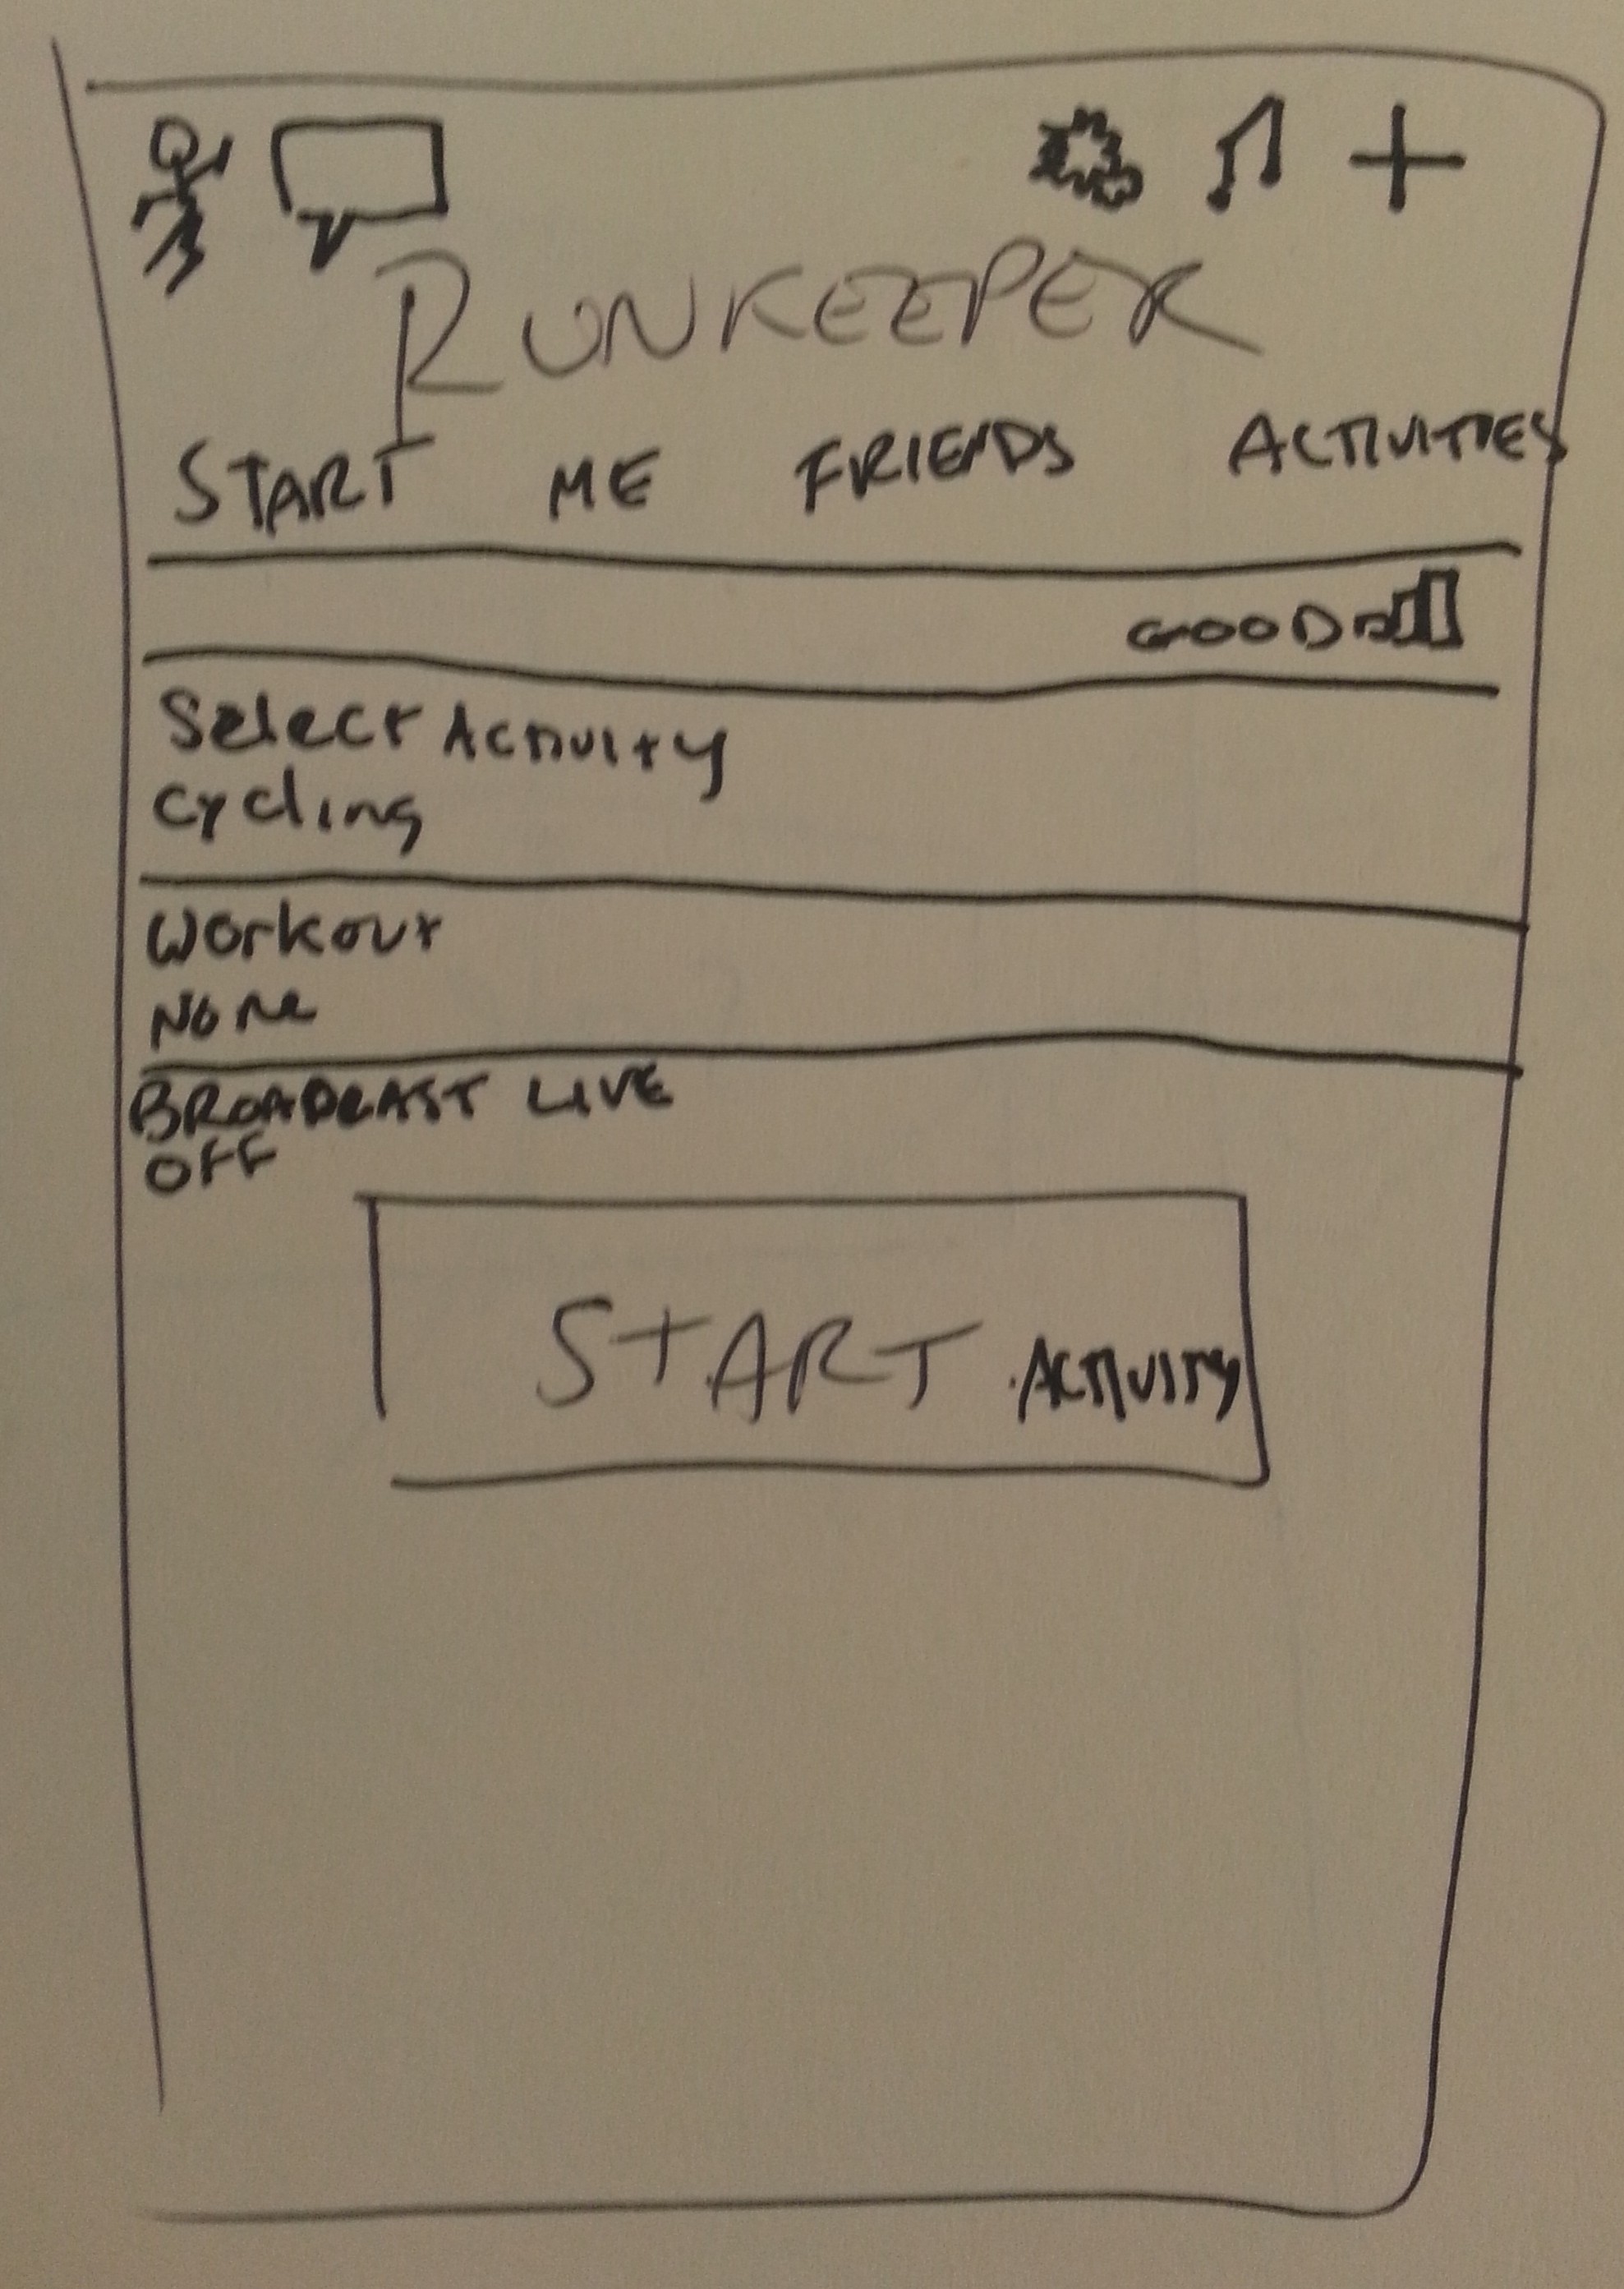
Then you hit "MAGIC BUTTON!" and the spinner spins for a while, and in your inbox you get a basic html+css template with your sketch already implemented, say with a basic grid, buttons, and text areas, all pre-rendered and put into a reasonably usable format. Of course, with just a tiny bit of tweaking, it looks like this:

Why oh why does this not exist? I can see how you could create something that would take these images and a couple of additional parameters, like, say, color palette, grid type that you want (or preexisting template format), and then send it off to some designers to bid upon and build for you, a la Mechanical Turk, ODesk, or eLance. With some OCR intelligence, you could probably even get part of the way there in a fully automated fashion.
With all the advances in HTML/CSS/JS technologies and frameworks out there, how come there's nothing out there to even turn , say, Balsamiq Mockups directly into basic gridded HTML?
 Hmmmm.
Update:Just found Napkee which purports to do this for Balsamiq mockups...